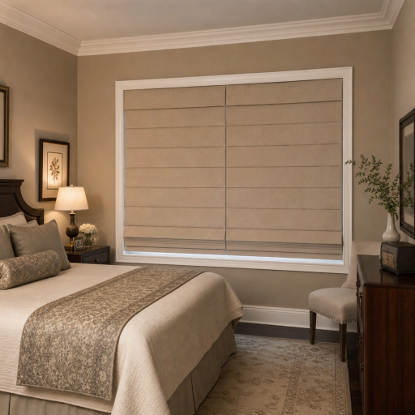
How to measurement and install your roller blinds
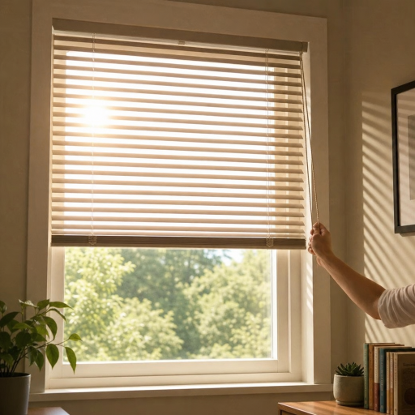
Measuring and installing roller blinds is a manageable home project when you work carefully and check each stage before drilling. This guide shows you how to measure window blinds, choose the right fitting position, and complete a neat roller blinds fitting with basic DIY tools. Whether you are replacing an old blind or putting up new diy roller blinds, the key is accurate measurement, level brackets, and a clean test run before you finish.
What do you need before you start?
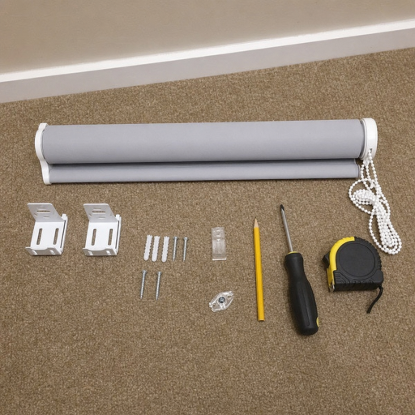
You need the correct blind size, the right fixing position, and a safe way to attach the brackets to your wall, window recess, or ceiling. Before ordering or fitting, decide whether the blind will sit inside the window recess for a flush look or outside the recess for more coverage. Then gather your tools so you can measure, mark, drill, and test the blind without stopping halfway through.
Useful items include:
- Metal tape measure for accurate width and drop measurements
- Pencil for light, removable marks
- Spirit level to keep the blind straight
- Drill and suitable drill bit for your surface
- Wall plugs and screws if they are not supplied or if your wall needs stronger fixings
- Screwdriver
- Step ladder if the window is high
- Safety glasses when drilling
- The roller blind, brackets, chain control, safety device, and any supplied instructions
1. Decide between inside and outsiderecess fitting
Start by choosing where the blind will sit. An insiderecess fitting places the roller blind within the window opening, which gives atidy, built-in finish and keeps the blind close to the glass. This works bestwhen the recess is deep enough for the brackets and roller tube, and whenhandles, vents, or tiles will not block the blind.
An outside recess fitting places the blind on the wallabove and around the window opening. This can help reduce light gaps at thesides, cover an uneven recess, or make a small window look larger. It is alsouseful when the recess is too shallow for a clean roller blinds fitting.
Check for obstructions before you measure. Windowhandles, inward-opening windows, radiator covers, picture rails, or unevenplaster can all affect where the roller sits and how smoothly the fabric drops.
2. Measure the window width accurately
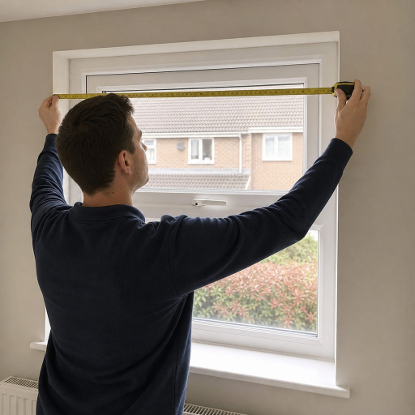
Use a metal tape measure rather than a soft sewingtape, because it stays straighter and gives a more reliable result. If you aremeasuring for an inside recess blind, measure the width in three places: nearthe top, across the middle, and near the bottom. Use the smallest measurement,because many window recesses are not perfectly square.
For an outside recess blind, measure the full area youwant the fabric to cover. Add extra width on both sides of the window openingif you want better privacy and less light leakage. Keep the overlap even oneach side so the finished blind looks balanced.
Write the measurements down immediately and label themclearly. A common mistake when you measure window blinds is mixing up width anddrop, so always record width first and drop second if that is how your supplierrequests the sizes.
3. Measure the drop from top to bottom
For an inside recess blind, measure from the top of therecess to the sill or the point where you want the blind to stop. Take thismeasurement in at least two places, especially if the sill is uneven. If theblind is going inside a tiled recess or above a sink, check that the bottom barwill not hit anything when lowered.
For an outside recess blind, measure from the plannedbracket position down to where you want the blind to finish. Many people choosea drop that extends slightly below the window opening for extra coverage. Ifthere is a radiator, desk, or furniture beneath the window, leave enoughclearance so the blind can hang freely.
Do not roundmeasurements casually. If you are ordering made-to-measure diy roller blinds,follow the supplier’s measuring rules exactly, because some suppliers maketheir own deductions for recess fittings while others ask you to providefinished blind sizes.
4. Mark the bracket positionscarefully
Hold the brackets where they will be installed andlightly mark the screw holes with a pencil. Use a spirit level to check thatthe two bracket positions line up. Even a small difference in height can makethe blind roll unevenly or leave the bottom bar looking slanted.
Make sure there is enough space for the control chainon the side you prefer. Some roller blinds allow the chain to be fitted oneither side, while others are supplied with a fixed control side. Position thecontrol where it is easy to reach but not in the way of handles, furniture, ordaily movement around the window.
Before drilling, hold the blind or roller tube up tothe marks if possible. This quick dry fit helps confirm that the blind willclear the recess, open smoothly, and sit where you expect.
5. Drill pilot holes and fix thebrackets
Drill into the marked positions using a bit suitablefor the surface. For masonry, brick, or plaster, you may need wall plugs tocreate a secure hold. For timber, screws may fix directly, but pilot holes canhelp prevent splitting.
Attach the brackets firmly without overtightening.Brackets should not wobble, bend, or twist once fitted. If a screw keepsturning without gripping, stop and use a better fixing rather than hoping theblind will hold; roller blinds are handled daily, so weak brackets can loosenover time.
Check the bracket direction before you tighteneverything fully. Roller blind brackets usually have a control-end bracket andan idle-end bracket, and fitting them the wrong way around can stop the blindfrom clicking into place.
6. Clip the roller blind into place
Fit the control end of the blind into its bracketfirst, then guide the opposite end into the second bracket. The blind shouldseat securely without forcing it. If it does not fit, remove it and check thebracket spacing, rather than pushing hard and damaging the mechanism.
Once the roller is in place, lower the fabric slowly.Watch whether it drops straight, clears the window handles, and stops at theheight you want. If the fabric pulls to one side, the brackets may not belevel, or the blind may need a small adjustment according to the productinstructions.
7. Install the chain safety device
If your roller blind uses a looped chain or cord, fitthe safety device supplied with it. This keeps the chain under control andhelps reduce the risk of loose loops, especially in homes where children orpets may be present. Install it at the correct tension so the chain movessmoothly but does not hang freely.
Place the device where the chain can be reachedcomfortably. Test the blind several times after fitting it, because anover-tight chain may feel stiff, while a loose chain may not sit safely orneatly.
8. Test the blind and make finaladjustments
Roll the blind fully down and fully up several times.The fabric should wrap evenly around the tube, the bottom bar should sit level,and the chain should operate without catching. If anything feels stiff, stopand inspect the brackets, chain, and side clearance.
Use this final checklist before you finish:
- The brackets are secure and level
- The blind clears handles, tiles, vents, and furniture
- The fabric rolls straight without creasing at one edge
- The chain control is on the preferred side
- The safety device is fitted and working
- Pencil marks and drilling dust have been cleaned away
What if the blind does not rollsmoothly?
If the blind catches, rolls unevenly, or drifts to oneside, check the simplest causes first. Make sure the brackets are level, thetube is fully seated, and the fabric is not rubbing against the recess or wall.Small fitting errors can have a noticeable effect because the roller depends onstraight, even support.
If the blind is too tight in an inside recess, it mayneed more side clearance or a different bracket position. If it rollsdiagonally, lower it fully, guide the fabric back into alignment by hand, androll it up slowly. Persistent issues may mean the measurements, deductions, orbracket spacing need to be reviewed.
Finish with a clean, confident fit
A good roller blind installation is not about rushingthe drilling; it is about measuring twice, marking clearly, and checking themovement before calling the job done. With careful preparation, most diy rollerblinds can be fitted neatly using everyday tools. Take your time with eachstep, and you will get a straighter blind, smoother operation, and a cleanerfinish around your window.
Ready to see the difference? [Click here to explore on the blinds] or contact to the DR blinds teams today for a free quote. Let's bring the breezy, elengelent style to your home - for less.